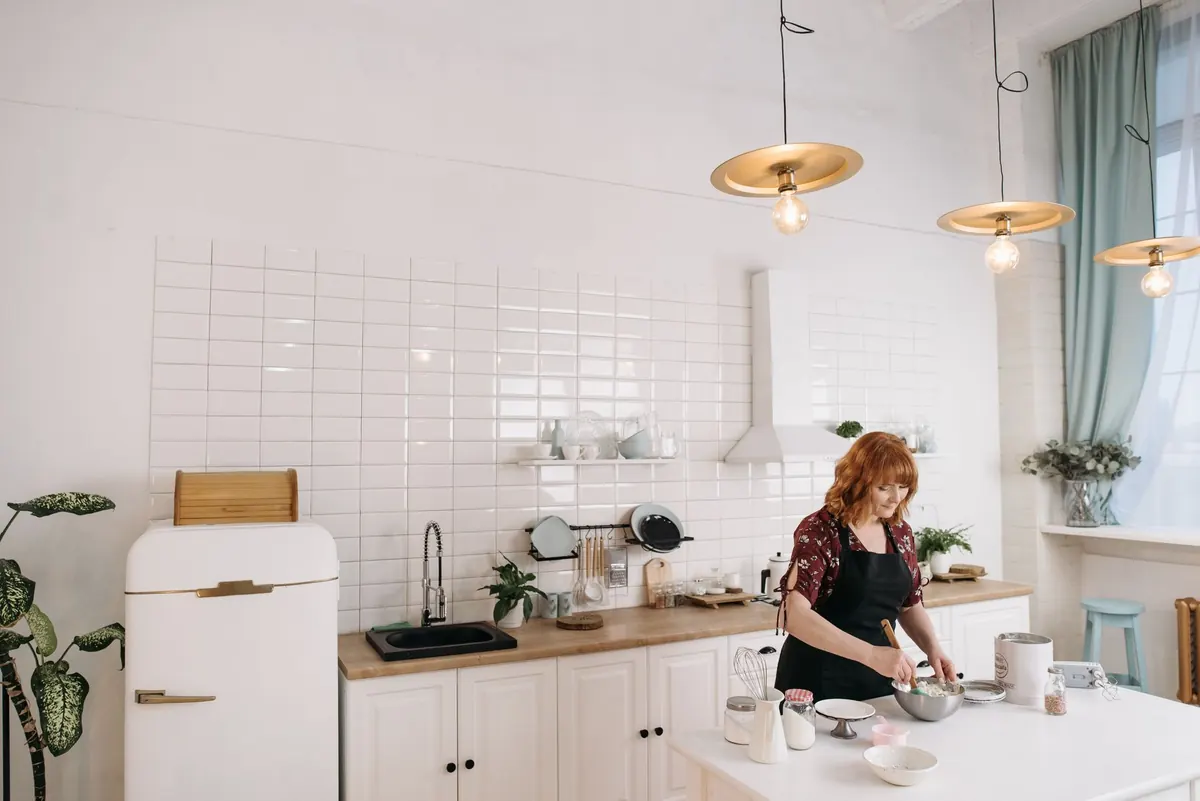
Pendant lights over a kitchen island are the hardest-working fixtures in the room. They light chopping, homework, late-night conversations, and the occasional bowl of cereal. They also set the tone for the whole kitchen. But they are surprisingly easy to get wrong. The mistakes are rarely about the fixture itself. They are about placement, proportion, and control. Get those right, and the room feels intentional. Get them wrong, and something feels off even if you can’t name it. This guide covers the most common missteps and how to avoid them.
Hanging Them at the Wrong Height
The most common mistake is hanging pendants too high. People worry about bumping their heads, so they clear the island by a mile. The result is a light that feels disconnected from the counter, and you see more glare because the bulb sits in your line of sight. Too low is just as bad. It blocks sightlines, makes the island feel cramped, and can be a hazard when you’re carrying a hot pan.
The sweet spot is usually 30 to 36 inches from the countertop to the bottom of the fixture. That range works for most 8- to 10-foot ceilings. For higher ceilings, you can go a bit higher, but keep the relationship to the counter, not the ceiling. Measure from the counter. Have someone hold the pendant while you sit and stand at the island. Check from the next room. If the pendant disappears into the ceiling, lower it. If you can see the bulb from a seated position, raise it or switch to a shade that shields the bulb.
A quick height check
- Sit at the island. Can you see the bulb? If yes, it’s too low or too exposed.
- Stand two feet back. Does the pendant feel connected to the island? If it floats near the ceiling, lower it.
- Measure counter to bottom. Aim for 30–36 inches, then adjust for ceiling height and pendant size.
Spacing Them Like They’re on a Grid
Spacing mistakes are just as common. Two pendants crammed in the middle, or three spaced evenly but ignoring the island length. The goal is balance, not symmetry for its own sake. For two pendants, divide the island into thirds and center each pendant in its third. For three, divide into quarters and center each in its quarter. Leave at least 18 inches from the island edges to the outside edge of the pendant. Between pendants, aim for 30 to 36 inches on center for 8- to 12-inch-wide fixtures. If your pendants are wider, add a few inches. If narrower, you can tighten slightly.
The biggest mistake here is treating the island as a separate room. The pendants should feel like a set, not a crowd. If you have a sink or cooktop in the island, you may want to center a pendant over that feature, but keep the overall group balanced. Stand at the end of the island and squint. The spacing should look even from every angle.
Ignoring Scale and Proportion
Pendants that are too small for a large island look like earrings on a giant. Too large, and they overwhelm the space. A useful guideline: the total width of your pendant group should be about one-third to one-half the length of the island. For a 7-foot island, two 12-inch pendants with a 30-inch gap works well. For a 9-foot island, three 10- to 12-inch pendants. Also consider ceiling height and visual weight. Glass and open frames disappear; solid metal or large shades dominate. If you have a heavy island—waterfall counter, dark stone—you can handle heavier pendants. If the island is light and airy, choose pendants with less visual mass.
Skipping the Dimmer (or Using the Wrong One)
Pendant lights over an island are often the main light source for the kitchen. Without a dimmer, you get full blast or off. That’s a mistake. You want low light for a late snack and bright light for prep. Install a dimmer that is compatible with your bulbs. LED dimming can be tricky: not all dimmers work with all LEDs, and some flicker or drop out at low levels. Look for a dimmer with an adjustable low-end trim, or a smart dimmer that supports your bulb type. If you are unsure, consult a licensed electrician.
Also, consider separating the pendants from other kitchen lights. If they are on the same circuit as recessed lights, you can’t dim them independently. A separate switch or dimmer gives you control. That small electrical change makes the kitchen far more usable.
Forgetting About Glare and Beam Direction
Open-bottom pendants with exposed bulbs are a glare trap. When you sit, the bulb is right at eye level. Choose pendants with a diffuser, a frosted bulb, or a shade that extends below the socket. Also think about where the light goes. A narrow beam creates bright pools on the counter but dark edges. A wide beam spreads light but can wash out the room. For task lighting, aim for a beam that covers the work area without spilling into eyes.
Material matters. Metal shades reflect light down, glass shades spread it around, fabric shades soften it. If you have a glossy countertop, a downward beam can bounce glare back at you. Test with a temporary hanging before final installation if possible. A few minutes with a friend holding the fixture can save you from drilling holes in the wrong place.
Installation and Alignment Oversights
Not centering the pendants over the island is a common mistake. The island’s centerline is your reference, not the room’s center or the sink. Use a laser level or a chalk line to mark the ceiling. Make sure the junction boxes are securely anchored for the weight of the pendant. Pendants are heavier than they look. If you are not comfortable with electrical work, hire a licensed electrician. Also, check the cord length. Many pendants come with adjustable cords, but some are fixed. If the cord is too short, you’ll be forced to hang it too high. Measure twice.
Treating the Pendants as the Only Light
Pendants over an island are task lights, not the whole lighting plan. If you rely on them alone, you’ll have bright spots and dark corners. Add recessed lights, under-cabinet lights, or a wall light to balance. Also, think about color temperature. Warm white (2700K–3000K) feels cozy in a kitchen; cool white (4000K+) can feel clinical. Match the pendants to the rest of the room’s bulbs. If you use smart bulbs, make sure they dim smoothly and don’t buzz.
A Simple Pre-Installation Checklist
- Measure your island length and width.
- Choose pendants sized to the island: total width about one-third to one-half of island length.
- Plan spacing: 30–36 inches between centers, at least 18 inches from edges.
- Mark the centerline of the island on the ceiling.
- Confirm ceiling height and desired hanging height (30–36 inches above counter).
- Check that your dimmer works with your bulbs.
- Test a temporary hanging with tape or a friend before drilling.
- Hire a licensed electrician for hardwiring if needed.
Getting It Right the First Time
Pendant lights are a commitment. Once you drill holes in the ceiling, you’re living with the result. The good news is that the mistakes are predictable and avoidable. Hang them at the right height, space them with breathing room, scale them to the island, dim them properly, and layer them with other light. Then test everything in real life before you finalize. If you do that, your island will look and feel like the heart of the kitchen. And if you get it slightly wrong, many pendants have adjustable cords, so you can fine-tune after a few nights of living with them. Just don’t ignore the glare.
Photo: Pavel Danilyuk / Pexels